
As I was prepping for our game night, a familiar craving struck—those crispy loaded potato skins that always win over the crowd. With their delightful combination of crunchy edges and creamy cheese, it’s easy to see why they’re a staple at any gathering. This appetizer is not just simple to whip up, but it also packs enough flavor to turn even the most casual get-together into a memorable feast. Plus, they’re a versatile party snack that can be customized with your favorite toppings. Ready to impress your guests and elevate your snacking game? Let’s dive into this irresistible recipe for loaded potato skins that everyone will adore!
Why Are Loaded Potato Skins So Irresistible?
Crispy Perfection: Each bite offers a crunch that’s simply irresistible—perfectly baked to golden goodness.
Flavor Explosion: The combination of melted cheese and savory bacon elevates these appetizers to new heights, making them downright addictive.
Easy to Make: With minimal prep and cooking time, you can whip these up in no time, making them a go-to for unexpected guests or lively gatherings.
Party Favorite: Their crowd-pleasing nature ensures that they steal the spotlight at any event, from casual game nights to festive celebrations. Serve alongside a side of ranch for a match made in heaven, or check out my recipe for Sweet Potato Honey biscuits for a delightful dessert to round out your spread!
Customizable Delight: Whether you’re a fan of spicy toppings or prefer classic flavors, there’s no limit to how you can personalize your loaded potato skins.
Loaded Potato Skins Ingredients
• Perfect for any occasion!
For the Potato Skins
- Russet Potatoes – The ideal base for crispiness; choose small to medium sizes for the best hold.
- Unsalted Butter – Key for achieving golden-brown color; margarine or olive oil is a suitable alternative.
- Salt & Pepper – Essential seasonings that enhance the flavors of your loaded potato skins.
For the Filling
- Shredded Cheese (Mozzarella & Cheddar) – Creates a gooey texture; feel free to swap for pepper jack for a spicy twist.
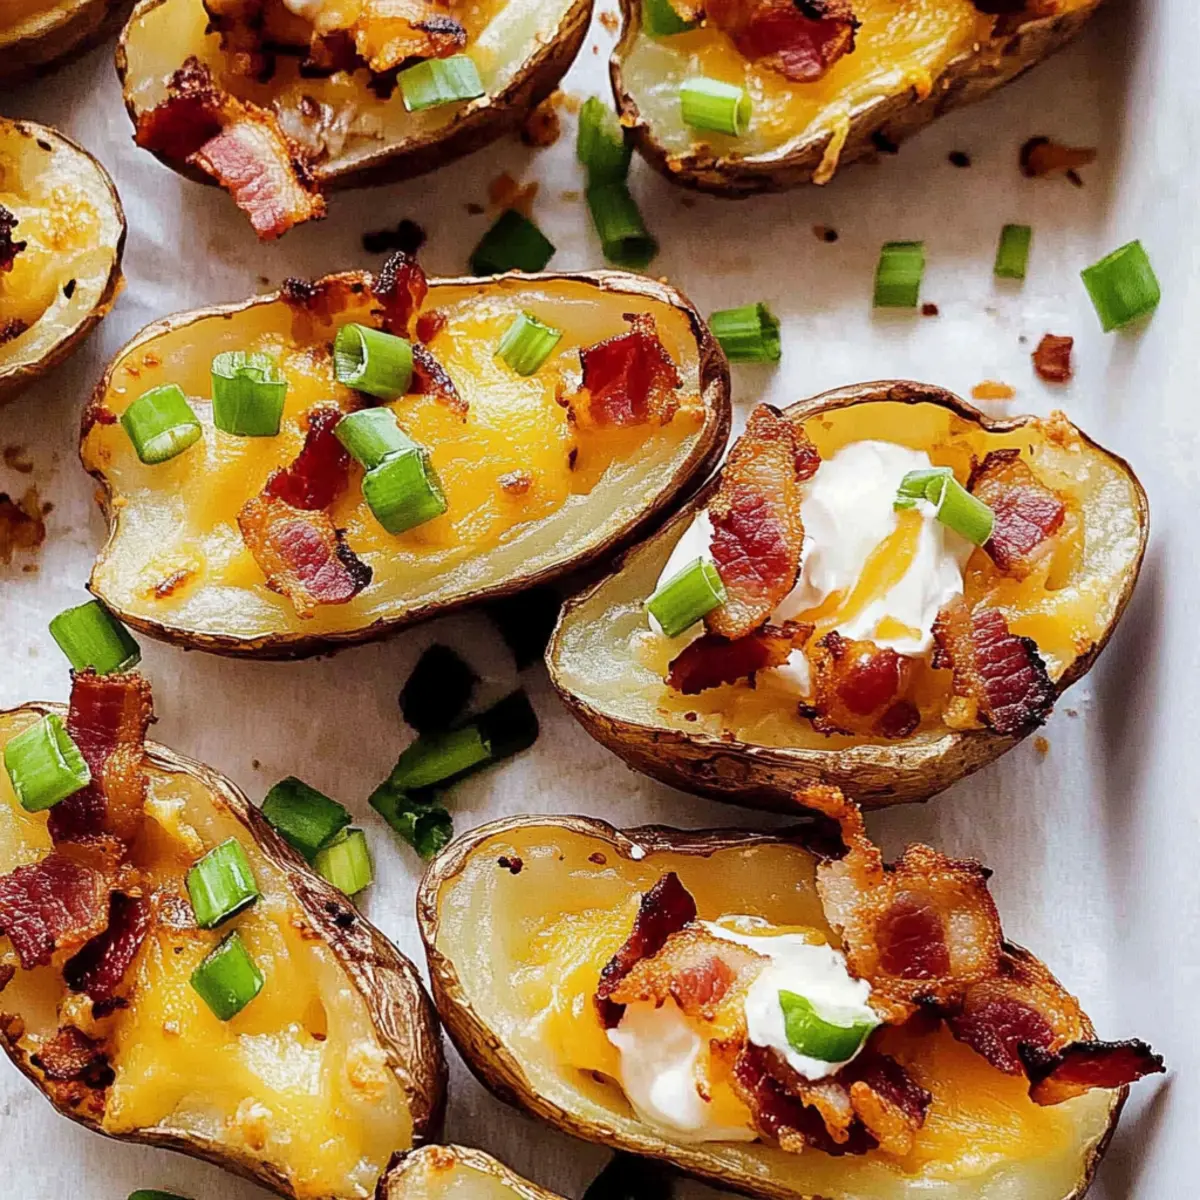
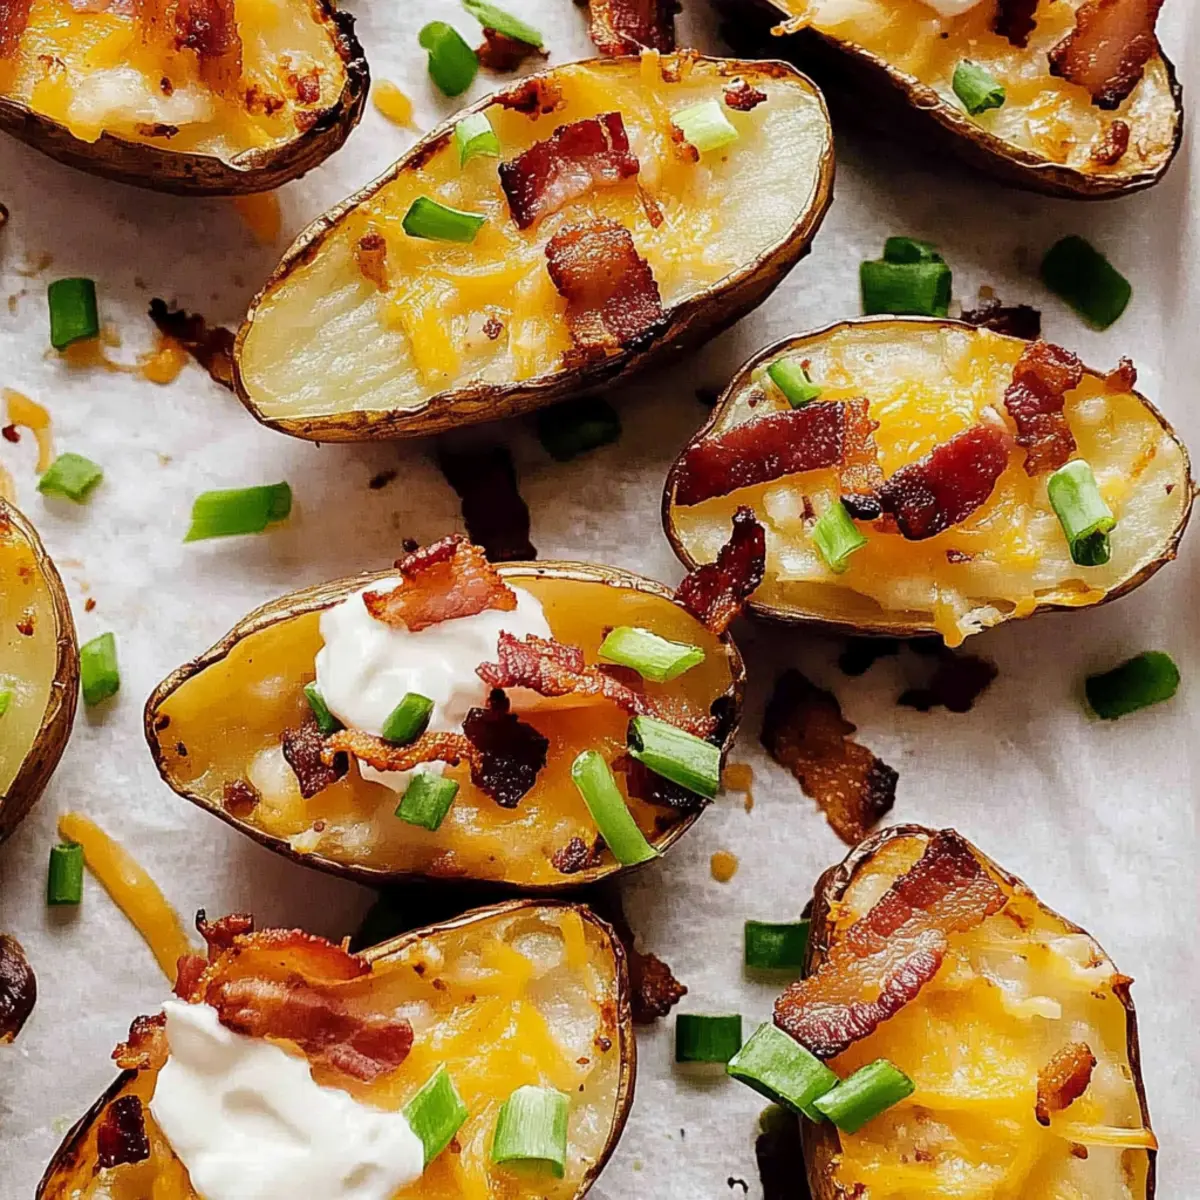
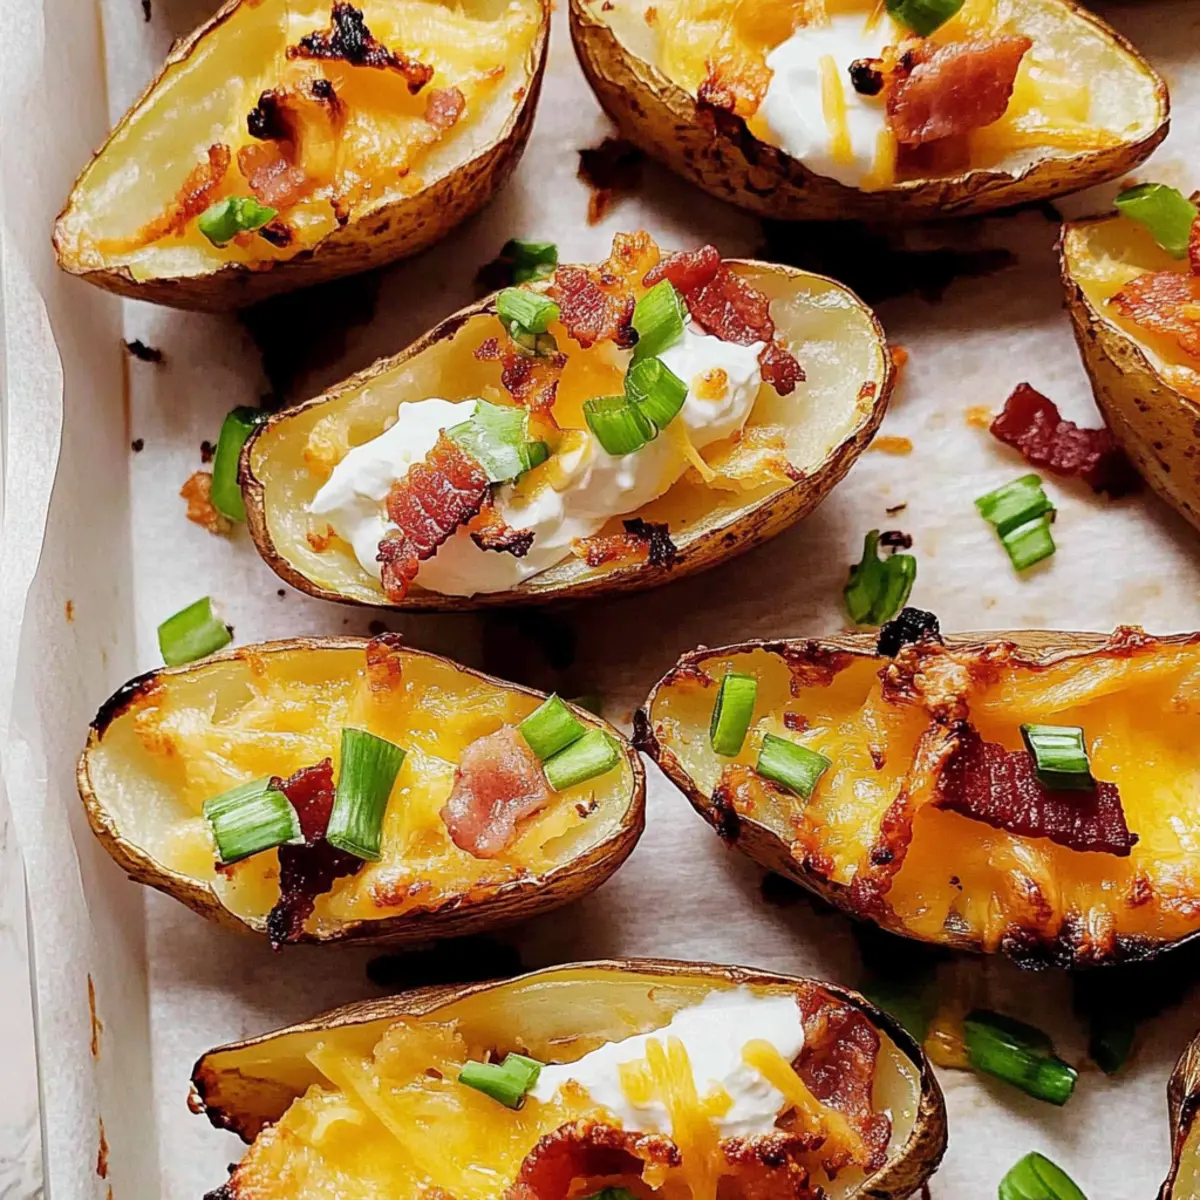
- Bacon – Adds a savory crunch; turkey bacon or a plant-based option can offer a lighter alternative.
- Sour Cream – A rich topping that pairs beautifully; Greek yogurt also works wonderfully for a healthier choice.
- Green Onions – Brings a fresh kick and color; optional but highly recommended, or replace with chives for a milder flavor.
Step‑by‑Step Instructions for Loaded Potato Skins
Step 1: Preheat and Bake Potatoes
Begin by preheating your oven to 400°F (200°C). While waiting for your oven, take small to medium-sized russet potatoes, poke each with a fork a few times to prevent bursting, and place them directly on the oven rack. Bake for 1 hour, until the skins are tender when squeezed, and the potatoes feel soft inside.
Step 2: Prepare the Potatoes
Once baked, allow the potatoes to cool for 15 minutes for easier handling. Carefully cut each potato in half lengthwise, using a sharp knife. Gently scoop out some flesh from the center with a spoon, leaving about a ¼ inch thick skin—this will keep the loaded potato skins sturdy for filling later.
Step 3: Brush with Butter
Next, preheat your broiler while you prepare the potato skins. Brush the insides and outsides of the scooped potato skins generously with melted unsalted butter. Sprinkle with salt and pepper for flavor enhancement. Place the potato skins cut-side up on a baking sheet, ready for broiling.
Step 4: Broil Until Crispy
Slide the baking sheet under the broiler and broil the potato skins for 7-8 minutes. Keep a close eye as they broil—you’re aiming for a crispy, golden texture on the edges. This is where those loaded potato skins begin to take on a wonderfully crunchy character that everyone will love!
Step 5: Add Cheese and Sour Cream
Remove the potato skins from the oven and add a generous dollop of sour cream to each one. Next, top each with a heaping layer of shredded mozzarella and cheddar cheese. Carefully return them to the broiler for an additional 3-4 minutes, until the cheese is melted, bubbling, and beautifully golden brown.
Step 6: Finish and Serve
Finally, take your loaded potato skins out of the oven and sprinkle crumbled bacon and chopped green onions on top for added flavor and a pop of color. Add an extra dash of black pepper if desired. Serve immediately while hot and enjoy those crispy, cheesy delights with your favorite dipping sauce!
Loaded Potato Skins Variations & Substitutions
Feel free to tweak this recipe and make it your own with these delightful variations!
-
Spicy Kick: Add diced jalapeños or a few dashes of your favorite hot sauce for a fiery twist that complements the cheese beautifully.
Spice adds a whole new layer of excitement. Your taste buds will dance with each crunchy bite! -
BBQ Twist: Swap traditional toppings for BBQ chicken and drizzle with a tangy sauce for a sweet, smoky flavor.
It’s an unexpected twist that feels like a barbecue party in every mouthful. Perfect for any gathering! -
Mediterranean Style: Use feta cheese, sun-dried tomatoes, and olives for a unique Greek-inspired loaded skin.
The salty, briny flavors work wonderfully with the crispy potatoes, creating a taste adventure you won’t soon forget! -
Cheese Lovers: Break from the norm and combine multiple cheeses like gouda or pepper jack for an indulgently cheesy experience.
Each melted layer creates a gooey delight that promises to tantalize cheese aficionados! -
Vegetarian Delight: For a vegetarian option, load your skins with roasted veggies and a sprinkle of nutritional yeast for a cheesy flavor without any dairy.
Packed with nutrients and flavor, this variation is sure to please everyone at your table. -
Herbed Perfection: Sprinkle fresh or dried herbs like thyme or rosemary for an aromatic touch that enhances those savory flavors.
It elevates your loaded potato skins, transforming them into a delightful, fragrant dish! -
Dairy-Free: Use dairy-free cheese alternatives and cashew cream in place of the sour cream for a delicious vegan-friendly version.
Enjoy the same satisfying flavors without missing out on a thing! -
Seasonal Flavors: Top with a dollop of pumpkin puree and sage for a delightful autumn twist that redefines loaded potato skins.
This cozy combination brings a seasonal sparkle that’s both comforting and unique!
Feel free to explore these variations and check back for more creative ideas. Looking to pair this with something sweet? You can also try my recipe for Sweet Potato Honey biscuits for a delicious dessert! Enjoy playing with flavors!
What to Serve with Loaded Potato Skins
These crispy delights make for the perfect appetizer, but pairing them with the right sides can create a well-rounded meal experience.
- Chili: A warm, hearty bowl of chili adds a tasty contrast and complements the cheesy flavors beautifully, keeping your guests satisfied.
- Ranch Dip: Serve a side of cool ranch dip for a classic contrast to the warm, crispy potato skins, elevating every bite.
- Buffalo Chicken Wings: These spicy wings bring both heat and flavor, making them an excellent companion for loaded potato skins during game day gatherings.
- Caesar Salad: Fresh, crisp romaine lettuce and creamy dressing lighten the meal, balancing the richness of the potatoes for a refreshing touch.
- Grilled Vegetables: A medley of grilled vegetables introduces vibrant colors and flavors, offering a healthy complement to the indulgent flavors of loaded potato skins.
- Beer: A chilled craft beer or lager pairs wonderfully with the savory elements of the dish, creating a perfect match for game-day excitement.
- Chocolate Brownies: To add a sweet finish to your spread, rich chocolate brownies bring sweetness and indulgence, making the meal memorable.
Make Ahead Options
These loaded potato skins are perfect for meal prep enthusiasts! You can prepare the potato skins by baking and scooping them up to 24 hours in advance, then refrigerate them in an airtight container to maintain their crispness. Just brush them with butter and season before broiling, which can be done right before serving to ensure they’re fresh and golden. Additionally, the bacon can be cooked ahead and stored in the fridge, ready to sprinkle on top when you’re ready to serve. By following these make-ahead tips, you’ll save valuable time, allowing you to enjoy delicious loaded potato skins without the last-minute rush!
Storage Tips for Loaded Potato Skins
Fridge: Store leftover loaded potato skins in an airtight container for up to 3 days. This will help them retain their flavor while keeping them fresh.
Freezer: If you want to keep them longer, freeze the baked potato skins before adding toppings in a single layer on a baking sheet, then transfer to a freezer-safe container for up to 2 months.
Reheating: For the best results, reheat frozen loaded potato skins straight from the freezer in a preheated 375°F (190°C) oven for about 15-20 minutes until heated through.
Room Temperature: Avoid leaving cooked loaded potato skins at room temperature for more than 2 hours to ensure food safety and quality.
Expert Tips for Loaded Potato Skins
- Don’t Over-Scoop: Leaving about ¼ inch of potato in the skin is essential to maintain its sturdiness and prevent breakage.
- Watch the Broiler: Cheese can burn quickly, so keep a vigilant eye during the broiling process for perfectly melted tops.
- Pre-Cook Bacon: Preparing the bacon in advance not only speeds up the assembly process but ensures a crispier texture on your loaded potato skins.
- Choose Potatoes Wisely: Opt for small to medium russet potatoes; they provide the best structure and optimal skin crispiness.
- Stay Creative with Toppings: Experiment with different cheese varieties or spicy add-ins to customize your loaded potato skins according to your and your guests’ preferences.

Loaded Potato Skins Recipe FAQs
What type of potatoes are best for loaded potato skins?
Absolutely, using small to medium-sized russet potatoes is ideal! They have the perfect balance of starch and structure, which yields crispy skins while keeping the insides fluffy and light. Smaller potatoes also make for better portion control when serving your guests.
How should I store leftover loaded potato skins?
You can store any leftover loaded potato skins in an airtight container in the refrigerator for up to 3 days. Just make sure they are completely cooled before sealing to maintain their taste. Reheat them in a preheated 375°F (190°C) oven for about 10-15 minutes until they’re crisped up again—trust me, your tastebuds will thank you!
Can I freeze loaded potato skins?
Yes, you can freeze them! It’s best to freeze the potato skins before adding any toppings. Start by baking the potatoes and let them cool completely. Then, scoop out the insides, place the hollowed potato skins in a single layer on a baking sheet, and freeze. Once frozen solid, transfer them to a freezer-safe container or bag. They can last up to 2 months in the freezer.
How do I prevent my loaded potato skins from falling apart?
Great question! To keep your loaded potato skins sturdy, be careful not to over-scoop the flesh. Leave about a ¼ inch of potato in the skins to maintain their structural integrity. This way, they can hold a generous amount of filling without falling apart during assembly or serving.
Are there any dietary considerations for loaded potato skins?
Absolutely! If you’re concerned about dietary restrictions, you can substitute bacon with turkey bacon or plant-based alternatives to make them lighter. Additionally, for a healthier option, swap sour cream with Greek yogurt. Always check for allergy information, particularly regarding your cheese and any toppings chosen, to ensure all your guests can enjoy these delightful snacks!
How can I personalize my loaded potato skins?
The more the merrier! You can spice things up by adding diced jalapeños or a splash of hot sauce before broiling. Feel free to play around with different cheese varieties—pepper jack adds a nice kick, while blue cheese can give a tangy twist. The options are endless, so let your creativity shine!
Loaded Potato Skins: Irresistibly Crispy Game Day Treats
Ingredients
Equipment
Method
- Preheat your oven to 400°F (200°C). Poke each potato with a fork and bake for 1 hour until tender.
- Let the potatoes cool for 15 minutes. Cut in half lengthwise and scoop out flesh, leaving ¼ inch skin.
- Brush the insides and outsides with melted butter and sprinkle with salt and pepper. Place cut-side up on a baking sheet.
- Broil the potato skins for 7-8 minutes until crispy and golden.
- Add a dollop of sour cream and top with cheese. Return to the broiler for another 3-4 minutes to melt cheese.
- Sprinkle with crumbled bacon and green onions, serve hot with dipping sauce.