
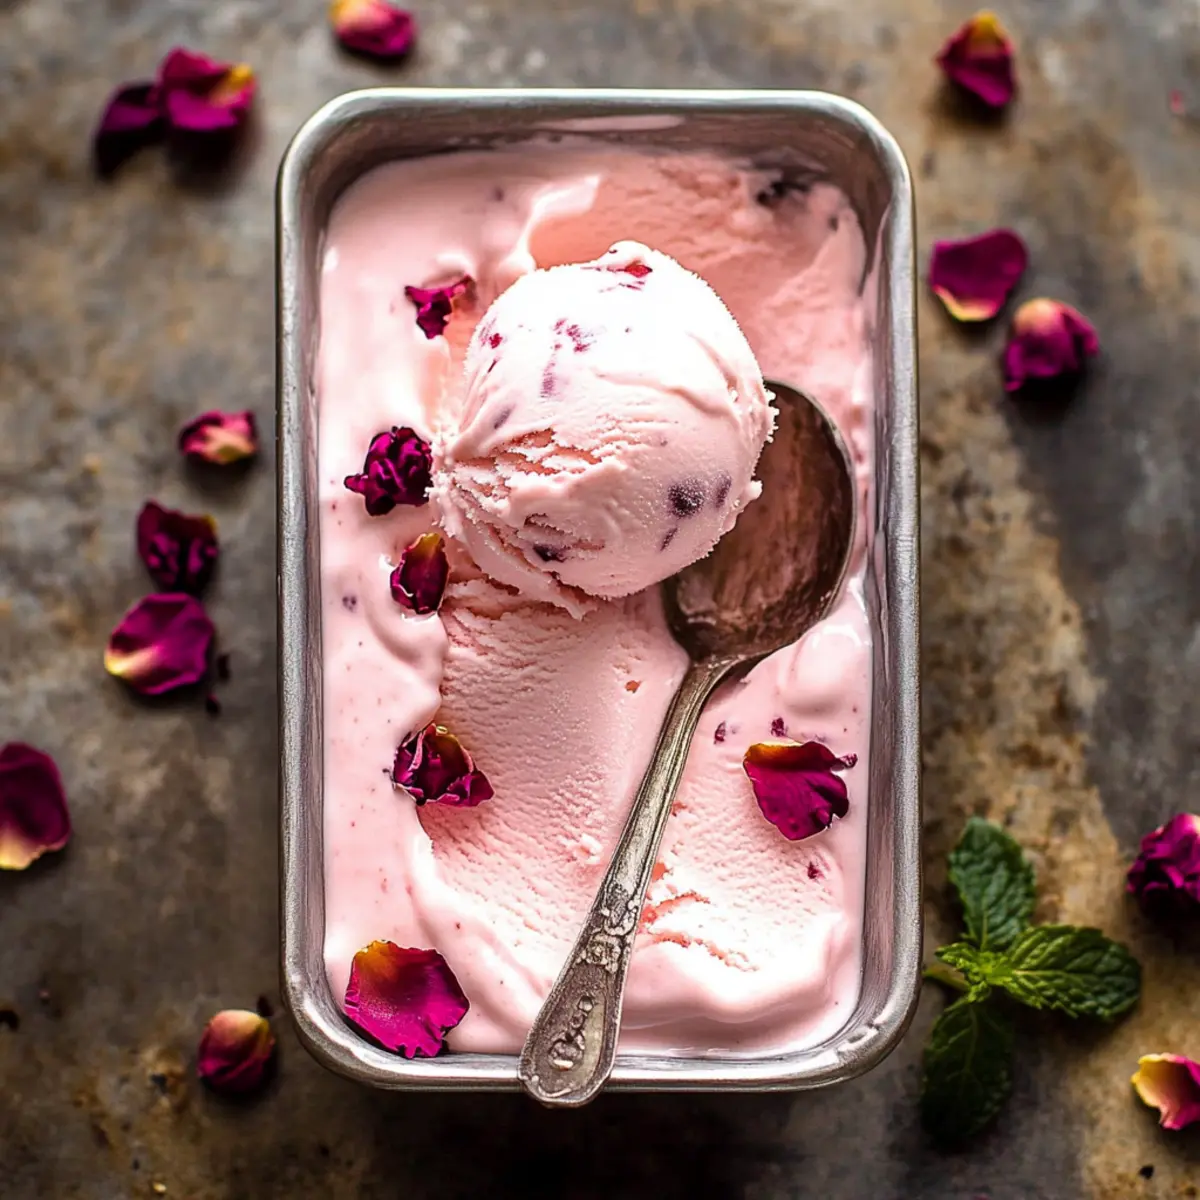
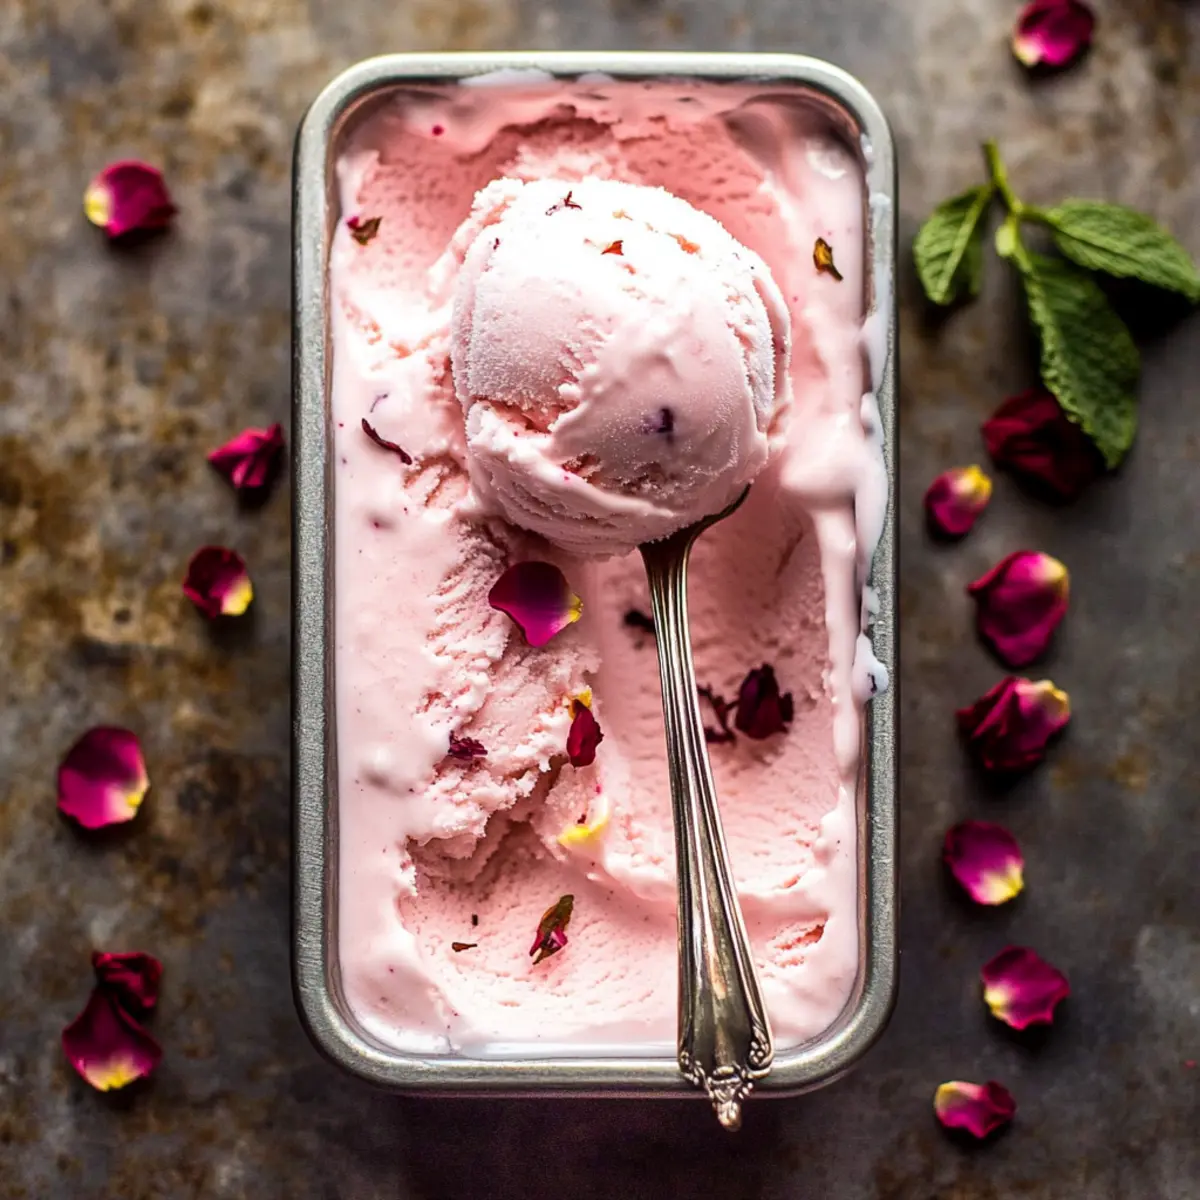
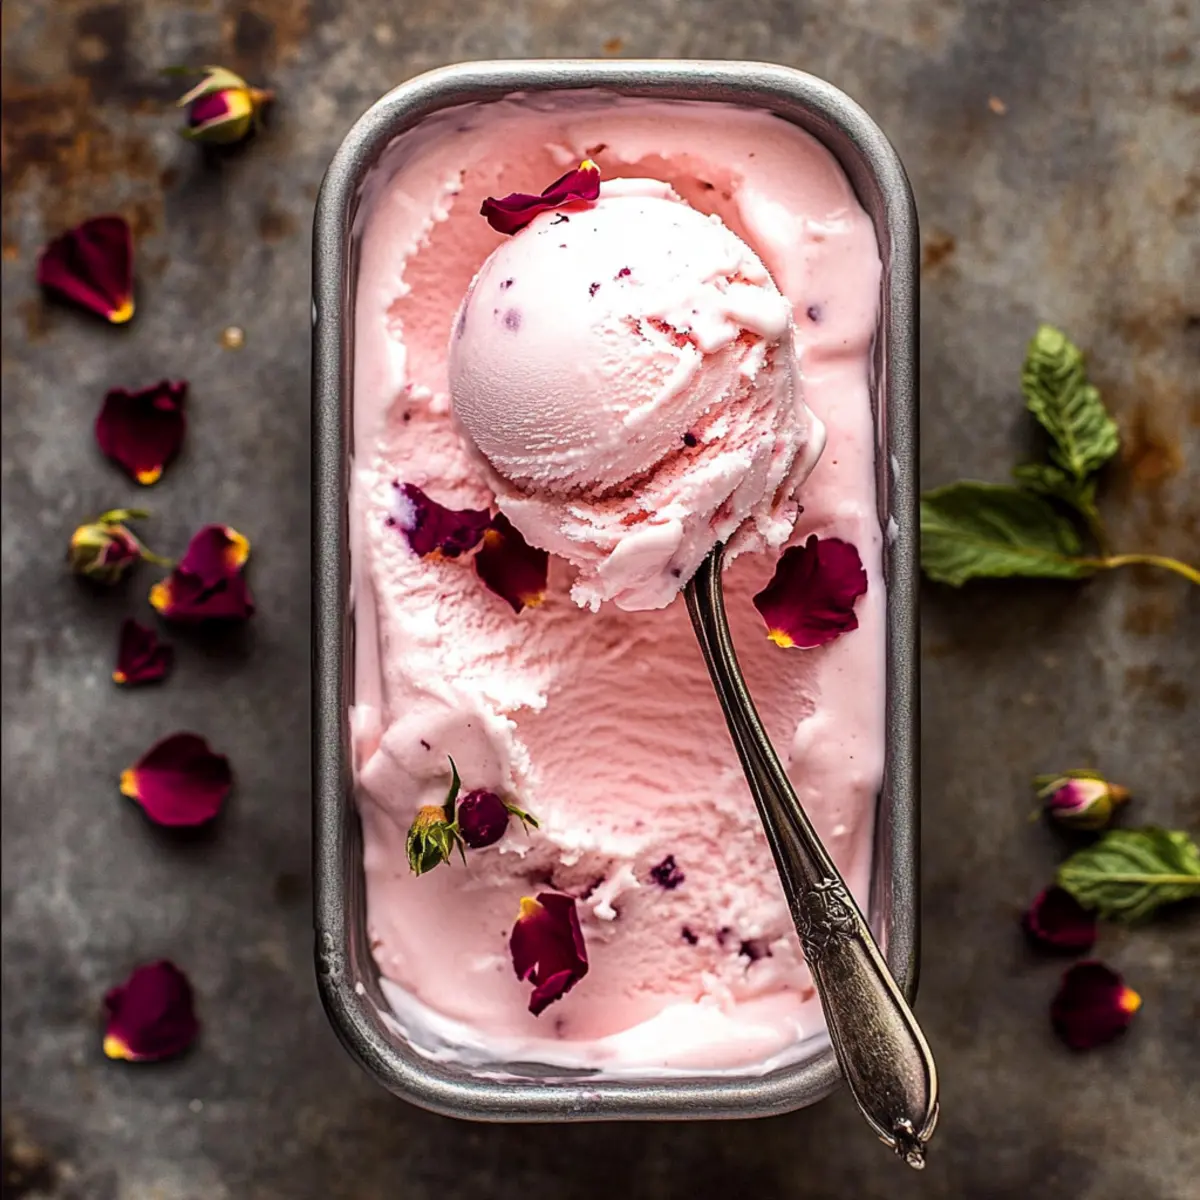
As I stirred the creamy mixture on a warm afternoon, the sweet aroma of rose water wafted through the kitchen, instantly transporting me to a blooming garden. This Delicate Rose Water Ice Cream is a charming homemade treat that beautifully captures floral flavors and offers a refreshing escape on hot days. With just a handful of simple ingredients, it’s not only a delight to make but also perfect for impressing guests or cherishing special occasions like Mother’s Day. Plus, it’s vegetarian-friendly, allowing everyone to savor this dreamy dessert guilt-free. Are you ready to indulge in a scoop (or two) of this enchanting ice cream?
Why Is Rose Ice Cream a Must-Try?
Irresistible Floral Flavor: The enchanting essence of rose water creates a unique taste experience that sets it apart from standard ice creams.
Easy to Make: With just a few simple ingredients, this recipe is perfect for both novice and seasoned bakers.
Versatile Treat: Customize your Rose Ice Cream by mixing in your favorite fruits or spices, like a hint of lavender for an aromatic twist.
Stunning Presentation: Serve in bowls adorned with edible rose petals for a picturesque dessert that will impress your guests.
Guilt-Free Indulgence: This vegetarian-friendly delight allows everyone to enjoy a scoop while maintaining a light and refreshing vibe, making it ideal for those looking to escape the fast-food routine. So, grab your ice cream maker, and get ready to savor the joyful flavors of homemade bliss!
Rose Ice Cream Ingredients
• Note: Gather these essentials for a creamy floral experience!
For the Base
• Whole Milk – Adds creaminess and richness; substitute with low-fat milk for a lighter version.
• White Sugar – Sweetens the ice cream; can be replaced with coconut sugar for a unique flavor.
• Heavy/Whipping Cream – Provides a luxurious texture; half-and-half works for a lighter feel but is less creamy.
• Pure Vanilla Extract – Enhances the flavor; try vanilla bean paste for an even richer taste.
For the Flavor
• Rose Water – Main flavoring that gives a lovely floral aroma; start with a small amount and adjust to taste.
• Pink Food Coloring – Optional for visual appeal; consider using natural food coloring for a healthier option.
Step‑by‑Step Instructions for Rose Ice Cream
Step 1: Mix Base
In a large mixing bowl, combine 2 cups of whole milk and 1 cup of white sugar. Using a hand mixer, beat the mixture on medium speed for about 2 minutes until the sugar is completely dissolved and the mixture is smooth and creamy. This step is crucial for your Rose Ice Cream, ensuring a sweet and well-integrated base.
Step 2: Combine Ingredients
Add 2 cups of heavy cream, 1 teaspoon of pure vanilla extract, and 2-3 tablespoons of rose water to the milk and sugar mixture. Gently mix with the hand mixer until fully combined, and the mixture becomes voluptuous and fragrant. If desired, add a few drops of pink food coloring for a beautiful hue, stirring until well blended.
Step 3: Ice Cream Maker
Pour your beautifully mixed Rose Ice Cream base into an ice cream maker, ensuring it’s evenly distributed. Churn the mixture for approximately 30 minutes or until it thickens to a soft-serve consistency. The ice cream should appear fluffy and slightly firm, indicating it’s ready to set into its final form.
Step 4: Serve or Store
Once the ice cream has reached your desired consistency, you can serve it immediately for a soft-serve treat. Alternatively, transfer the mixture into an airtight container and place it in the freezer. Allow it to firm up for at least 2-4 hours before serving for a classic scoopable texture that enhances the delicious floral flavors of the Rose Ice Cream.

How to Store and Freeze Rose Ice Cream
Fridge: Store any leftover Rose Ice Cream in an airtight container in the fridge for up to 3 days if you plan to enjoy it soon. However, the texture may slightly change.
Freezer: For long-term storage, place the ice cream in a tightly sealed container and freeze for up to 2 weeks. To enjoy its creamy texture again, let it sit at room temperature for 5-10 minutes before scooping.
Reheating: If you’ve stored it in the freezer and it becomes too hard, microwave it in 10-second bursts until it softens slightly for easier serving. This keeps your Rose Ice Cream delightful and enjoyable!
Covering: Always ensure the container is well-sealed to prevent freezer burn, which could affect the flavor and texture of your delicious homemade treat.
Make Ahead Options
These Rose Ice Cream delights are ideal for meal prep lovers! You can mix the base (milk, sugar, cream, vanilla, and rose water) up to 24 hours in advance and store it in the refrigerator to enhance flavors. Just make sure to cover the bowl tightly to prevent any absorption of odors. When it’s time to churn, pour the mixture into your ice cream maker straight from the fridge, and follow the regular instructions. If you refrigerate it longer, give it a good stir before churning to re-emulsify the ingredients. With these make-ahead tips, you’ll have this heavenly Rose Ice Cream ready to serve at a moment’s notice on warm evenings or special occasions!
Expert Tips for Rose Ice Cream
• Start Small: Begin with a small amount of rose water to avoid an overpowering flavor. You can always add more to achieve your desired taste.
• Use Food-Grade: Ensure your rose water is food-grade; cosmetic versions can be harmful. Always check the label before using.
• Churn Fully: Make sure to churn your mixture completely for the best texture. Under-churning may lead to a less creamy Rose Ice Cream.
• Customize Flavors: Don’t hesitate to mix in fresh fruits, nuts, or a hint of lavender during the last minutes of churning for a personal touch.
• Garnish Creatively: For a stunning presentation, serve your ice cream with edible rose petals or mint leaves for a beautiful touch that elevates the dessert experience.
Rose Ice Cream Variations & Substitutions
Feel free to enhance your Rose Ice Cream with these creative twists that will take your dessert experience to new heights!
- Dairy-Free: Substitute whole milk and heavy cream with coconut milk for a creamy, dairy-free version with a tropical flair.
- Flavorful Add-ins: Mix in small pieces of fresh strawberries or raspberries during the last minutes of churning for delightful bursts of fruitiness. Imagine a wonderfully refreshing flavor fusion with every bite!
- Lavender Twist: Add a teaspoon of dried culinary lavender to the base for an elegant floral blend that complements the rose beautifully.
- Nutty Flavor: Fold in finely chopped pistachios after churning for a delightful crunch and a nutty contrast to the smooth ice cream. This creates a wonderful textural experience!
- Gourmet Vanilla: Swap out standard vanilla extract for a splash of vanilla bean paste for a deeper, richer vanilla flavor that enhances the overall profile of the ice cream.
- Spicy Heat: Add a pinch of ground cardamom or a dash of cayenne pepper to give your Rose Ice Cream a surprising kick that dances on the palate.
- Chocolate Delight: Drizzle in a bit of melted white chocolate right before serving for an irresistible sweet indulgence. The creaminess of the chocolate pairs perfectly with the floral notes!
- Citrus Zing: Incorporate a teaspoon of lemon or orange zest into the base for a lively citrus brightness that balances the sweetness of the rose water, making the dessert even more invigorating.
Explore these variations to make this delightful Rose Ice Cream your own! You might even consider serving it alongside some elegant Pistachio Cream Cookies or a freshly baked Cinnamon Sugar Cream muffin for an exquisite treat experience. Enjoy your creative culinary journey!
What to Serve with Rose Ice Cream
Indulging in Rose Ice Cream opens the door to a world of delightful pairings that can elevate your dessert experience.
-
Lemon Sorbet: A zesty sorbet cuts through the creaminess, adding a refreshing contrast to the floral ice cream. The bright pop of citrus will awaken your palate and balance the sweetness beautifully.
-
Pistachio Muffins: The earthy crunch of pistachios complements the delicate rose flavor, creating a harmonious blend of textures and tastes. Serve them warm for an inviting treat that guests will love.
-
Honey Drizzle: A light drizzle of honey adds just the right touch of sweetness, enhancing the floral notes of the ice cream. It’s a simple yet elegant way to elevate each scoop.
-
Cardamom Cookies: Fragrant cardamom cookies offer a spicy element, perfectly pairing with the floral notes of your Rose Ice Cream. Their crunch and warmth create a cozy dessert combo that feels like a hug in dessert form.
-
Mint Tea: A cup of fresh mint tea provides a refreshing liquid companion, cleansing the palate between bites. Its soothing aroma makes for a delightful end to any meal.
-
Fresh Berries: A medley of mixed berries brings bright bursts of color and tartness that elevate the sweetness of the Rose Ice Cream. Strawberries, blueberries, and raspberries create a stunning presentation while adding vibrant flavors.
-
Chocolate Sauce: A rich, dark chocolate sauce drizzled over the ice cream creates a dramatic contrast. The bitterness of chocolate plays wonderfully against the sweet floral notes, making each bite an indulgent experience.
-
Vanilla Shortbread: The buttery crunch of vanilla shortbread adds a satisfying texture that complements the creamy ice cream. Their delicate flavor allows the rose essence to shine while providing a delightful contrast.
Rose Ice Cream Recipe FAQs
How do I choose the right rose water?
Absolutely! Make sure to select food-grade rose water, as many brands are only suitable for cosmetic use. Look for products that specifically state they are for culinary purposes. Starting with a smaller amount is advisable; feel free to gradually increase until you reach your preferred floral flavor.
How should I store my Rose Ice Cream?
For short-term enjoyment, store any leftover Rose Ice Cream in the fridge in an airtight container for up to 3 days. However, if you want to keep it long-term, seal it tightly in a freezer-safe container and freeze for up to 2 weeks. To serve, let it sit at room temperature for about 5-10 minutes before scooping for the best texture.
Can I freeze Rose Ice Cream?
Yes, indeed! To freeze your Rose Ice Cream, transfer it to an airtight container, ensuring it’s well-sealed to prevent freezer burn. It can last in the freezer for about 2 weeks. When you’re ready to enjoy it, let it sit out for a few minutes to soften, or microwave in 10-second bursts to make scooping easier.
What should I do if my Rose Ice Cream is too hard?
If your Rose Ice Cream is too hard after freezing, simply take it out and let it sit at room temperature for about 5-10 minutes. This will allow it to soften up nicely. Alternatively, you can microwave it in short intervals (10 seconds at a time) to reach the perfect consistency without melting it completely.
Is this recipe suitable for people with allergies?
The Rose Ice Cream recipe is vegetarian-friendly, but as with any recipe, it’s important to consider individual allergies. The main ingredients—milk, cream, and sugar—may pose issues for those with dairy allergies, so you could substitute with non-dairy alternatives like coconut or almond milk. Always check labels for potential allergens!
Can I add other flavors or ingredients to my Rose Ice Cream?
The more the merrier! Feel free to get creative by mixing in fresh fruit, such as strawberries or raspberries, or even a hint of lavender during the last few minutes of churning. This not only enhances the flavor but creates a stunning visual appeal in your Rose Ice Cream!
Luxurious Rose Ice Cream That Will Brighten Your Day
Ingredients
Equipment
Method
- In a large mixing bowl, combine 2 cups of whole milk and 1 cup of white sugar. Beat on medium speed for about 2 minutes until the sugar is dissolved.
- Add 2 cups of heavy cream, 1 teaspoon of pure vanilla extract, and 2-3 tablespoons of rose water. Gently mix until fully combined.
- Pour the mixture into an ice cream maker and churn for approximately 30 minutes or until it thickens to a soft-serve consistency.
- Once at the desired consistency, serve immediately or transfer to an airtight container to freeze for 2-4 hours for a scoopable texture.